
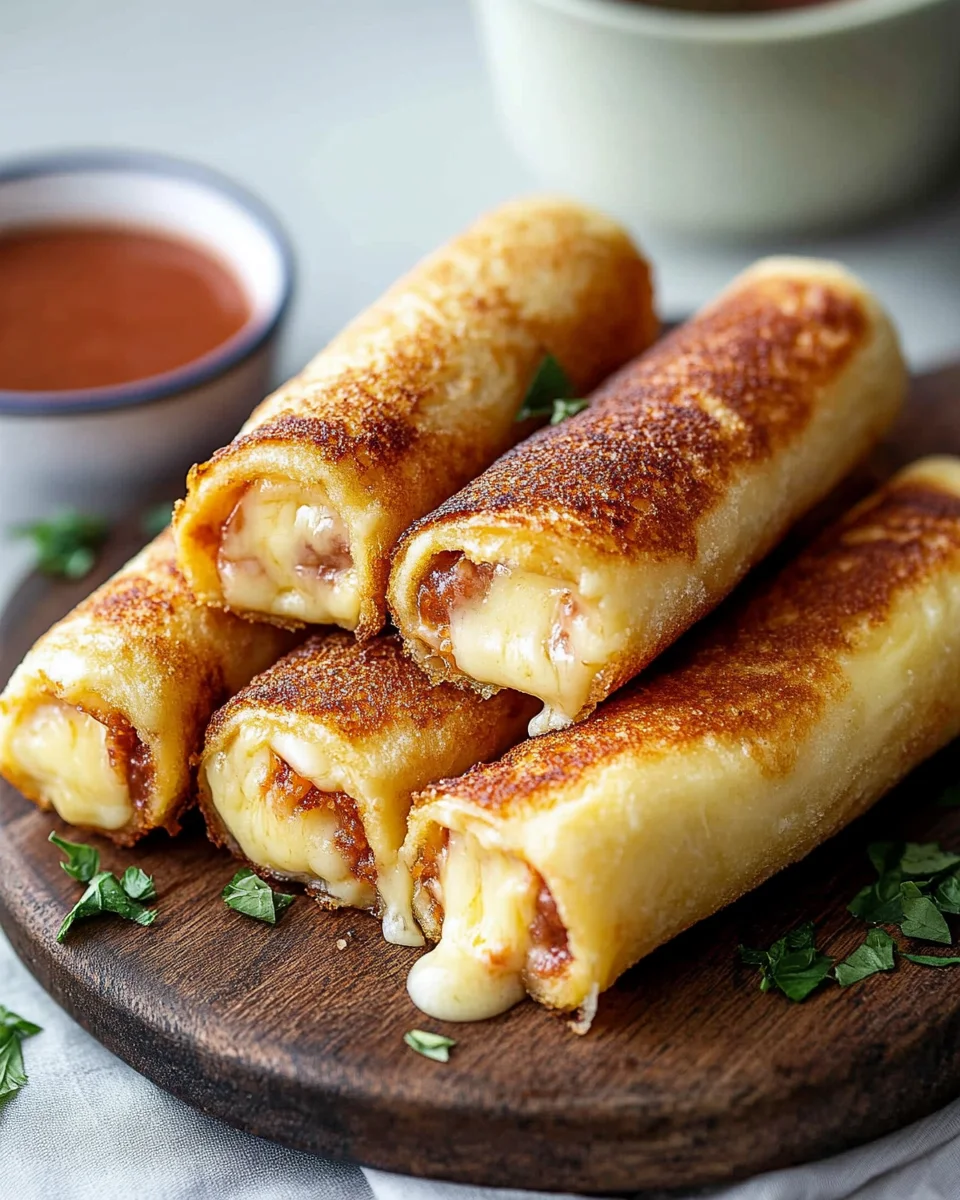
These Grilled Cheese Roll-Ups are not just your ordinary cheese sandwiches; they bring excitement to the classic grilled cheese experience. Perfect for any occasion, these roll-ups are a hit at parties, a quick snack after school, or an easy lunch option. With their crispy exterior and gooey cheese center, they appeal to both kids and adults alike. Plus, they can be customized with different fillings, making them a versatile choice for any palate.

Why You’ll Love This Recipe
- Quick to Prepare: With just 10 minutes of prep time, you can whip up these tasty treats in no time.
- Kid-Friendly Fun: Kids love rolling up their own ingredients, making this a great cooking activity for families.
- Versatile Ingredients: Customize with your favorite cheeses or add in extras like veggies or different meats.
- Perfect for Any Meal: Serve them as an appetizer, snack, or even a light lunch; their versatility is unmatched.
- Minimal Cleanup: Just one skillet needed for cooking means less mess and easier cleanup.
Tools and Preparation
Before diving into making your grilled cheese roll-ups, gather your essential tools. Having the right kitchen equipment will make the process smoother and more enjoyable.
Essential Tools and Equipment
- Rolling pin
- Skillet
- Toothpicks (optional)
- Spatula
Importance of Each Tool
- Rolling pin: Helps flatten the bread slices evenly for perfect roll-ups.
- Skillet: Provides an ideal surface to cook the roll-ups until golden brown and crispy.
- Toothpicks: Useful for securing the roll-ups if they don’t hold together well while cooking.
Ingredients
For the Roll-Ups
- 6 slices of bread
- 1 cup thinly shredded cheese
- 6 thinly slices of ham (optional)
- 2 tbsp of butter
How to Make Grilled Cheese Roll-Ups
Step 1: Prepare the Bread
- Trim the crusts off each slice of bread using a sharp knife.
- Roll each slice flat using a rolling pin until it’s even and thin.
Step 2: Add Fillings
- Sprinkle shredded cheese evenly over each flattened slice of bread. If desired, place ham on top of the cheese.
Step 3: Roll Them Up
- Starting from one end, tightly roll each slice of bread. If needed, secure with toothpicks to keep them closed during cooking.
Step 4: Cook the Roll-Ups
- Heat a skillet over medium to medium-low heat. Add butter and let it melt.
- Place the rolled-up sandwiches in the skillet. Cook for 5–8 minutes, turning occasionally until all sides are evenly browned.
Step 5: Serve and Enjoy
- Once cooked to perfection, remove the roll-ups from the skillet. Cut them in half if desired and serve warm.
These grilled cheese roll-ups are sure to become a family favorite! Enjoy experimenting with different ingredients and serving styles.
Grab This Chef Knife Now - Almost Gone!
How to Serve Grilled Cheese Roll-Ups
Grilled cheese roll-ups are versatile and can be served in various delightful ways. Whether you’re entertaining guests or looking for a quick meal, these roll-ups pair well with a variety of dips and sides.
With Dipping Sauces
- Marinara Sauce – This classic tomato sauce adds a tangy flavor that complements the cheesy goodness.
- Ranch Dressing – Creamy ranch provides a cool contrast to the warm, crispy roll-ups.
- Ketchup – A simple yet popular choice, especially for kids who love this classic dip.
As Part of a Platter
- Vegetable Sticks – Pair your roll-ups with crunchy carrots and celery for a healthy crunch.
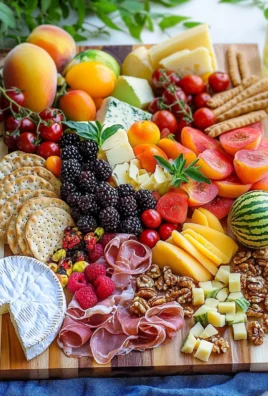
- Cheese Board – Add assorted cheeses and crackers to create an engaging snack board.
- Fruit Skewers – Fresh fruits like grapes or strawberries bring sweetness to balance the savory flavors.
For Breakfast
- Scrambled Eggs – Serve alongside fluffy scrambled eggs for a hearty breakfast option.
- Smoothies – A refreshing smoothie can make this dish feel lighter while adding nutrients.
How to Perfect Grilled Cheese Roll-Ups
To ensure your grilled cheese roll-ups turn out perfectly every time, consider these helpful tips.
- Use Fresh Bread – Fresh bread rolls out better and creates a crispier texture when cooked.
- Don’t Overfill – Aim for just enough cheese (and ham) to avoid spills while rolling.
- Cook on Medium Heat – Cooking at medium heat allows the cheese to melt thoroughly without burning the bread.
- Flip Gently – Use a spatula to flip the roll-ups carefully, ensuring they maintain their shape.
- Let Them Cool Slightly – Allowing them to cool for a minute helps the cheese set slightly, making for easier eating.
- Experiment with Fillings – Try different cheeses or add herbs for unique flavor combinations.
Best Side Dishes for Grilled Cheese Roll-Ups
Grilled cheese roll-ups are delicious on their own but can be enhanced with tasty side dishes. Here are some excellent options to serve alongside them.
- Tomato Soup – A classic pairing that complements the cheesy flavors beautifully; warm it up for dipping.
- Potato Chips – Crunchy chips provide an enjoyable textural contrast; choose your favorite flavor!
- Salad – A light green salad with vinaigrette balances the richness of the roll-ups.
- Pickles – The tanginess of pickles cuts through the heaviness and adds a zesty kick.
- Fruit Salad – A mix of seasonal fruits adds freshness and sweetness to your plate.
- Coleslaw – This crunchy side offers great texture and a bit of tangy flavor, perfect alongside the cheesy snacks.
Common Mistakes to Avoid
Making grilled cheese roll-ups can be simple, but there are common pitfalls to watch for to ensure your dish turns out perfectly.
-
Skipping the crust removal: Leaving the crusts on can make the roll-ups tough and hard to roll. Always trim the edges for a better texture.
-
Not rolling tightly: If you don’t roll the bread tightly, the cheese may not melt properly, and they could unroll while cooking. Make sure to roll firmly.
-
Using too much butter: Overdoing it with butter can lead to greasy roll-ups. Just enough to coat the skillet will give you that perfect golden brown finish.
-
Cooking at high heat: High temperatures will burn the outside before the cheese melts inside. Cook on medium or medium-low heat for even cooking.
-
Neglecting to secure with toothpicks: If your rolls are loose, they may fall apart in the skillet. Use toothpicks if necessary to keep them intact while cooking.
Storage & Reheating Instructions
Refrigerator Storage
- Store leftover grilled cheese roll-ups in an airtight container.
- They will last up to 3 days in the refrigerator.
Freezing Grilled Cheese Roll-Ups
- Wrap each roll-up tightly in plastic wrap.
- Place them in a freezer-safe container or bag.
- They can be frozen for up to 2 months for best quality.
Reheating Grilled Cheese Roll-Ups
-
Oven: Preheat your oven to 350°F (175°C) and place roll-ups on a baking sheet. Heat for about 10-15 minutes until warmed through and crispy.
-
Microwave: Place on a microwave-safe plate and cover with a damp paper towel. Heat in short intervals of 20-30 seconds until warm, though this method may make them less crispy.
-
Stovetop: Heat a skillet over medium heat and add a little butter. Cook each side for about 2-3 minutes until heated through and crispy.
Frequently Asked Questions
Here are some common queries regarding grilled cheese roll-ups that can help you get started or troubleshoot any issues.
Can I use different types of cheese for Grilled Cheese Roll-Ups?
Yes! Feel free to experiment with various cheeses like mozzarella, cheddar, or pepper jack for added flavor.
How do I customize my Grilled Cheese Roll-Ups?
You can add vegetables like spinach or tomatoes or use different meats such as turkey or bacon for unique twists.
Are Grilled Cheese Roll-Ups kid-friendly?
Definitely! These roll-ups are easy for kids to eat and can be filled with their favorite ingredients, making them great snacks or lunches.
Can I make Grilled Cheese Roll-Ups ahead of time?
Yes! Prepare them in advance and store them in the refrigerator or freezer as described above for quick meals later.
Final Thoughts
Grilled cheese roll-ups are a delightful twist on a classic favorite, offering endless possibilities for customization. Whether enjoyed as a snack, appetizer, or lunch option, they are sure to please both kids and adults alike. Try adding your favorite ingredients or dipping sauces to make this recipe your own!

Grilled Cheese Roll-Ups
- Total Time: 18 minutes
- Yield: Serves 6 (1 roll-up per serving) 1x
Description
Grilled Cheese Roll-Ups are a fun and delicious twist on the classic grilled cheese sandwich, perfect for kids and adults alike. With their crispy exterior and gooey cheese filling, these roll-ups make an ideal snack, quick lunch, or party treat. In just 10 minutes of prep and minimal cleanup, you can create customizable roll-ups that are sure to impress. Fill them with your favorite cheeses and extras like ham or veggies to suit any taste. Whether served with dipping sauces or as part of a platter, these delightful bites are bound to become a family favorite.
Ingredients
- 6 slices of bread
- 1 cup shredded cheese (any variety)
- 6 thin slices of ham (optional)
- 2 tablespoons butter
Instructions
- Trim the crusts off each slice of bread and flatten with a rolling pin.
- Sprinkle shredded cheese onto each slice; add ham if desired.
- Tightly roll each slice and secure with toothpicks if needed.
- Heat a skillet over medium heat, melt butter, and cook roll-ups for 5-8 minutes until golden brown.
- Serve warm, optionally cut in half.
- Prep Time: 10 minutes
- Cook Time: 8 minutes
- Category: Snack
- Method: Frying
- Cuisine: American
Nutrition
- Serving Size: 1 roll-up (45g)
- Calories: 210
- Sugar: 1g
- Sodium: 480mg
- Fat: 12g
- Saturated Fat: 7g
- Unsaturated Fat: 4g
- Trans Fat: 0g
- Carbohydrates: 19g
- Fiber: 1g
- Protein: 8g
- Cholesterol: 30mg
Amazon's Best Seller Pasta Bowls Are Almost Gone!

Leave a Comment