
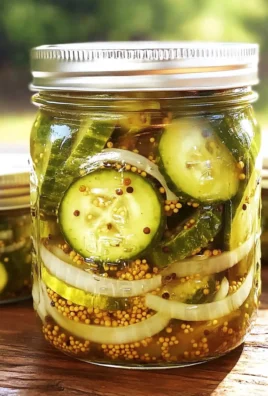
These Granny’s Bread and Butter Pickles Recipe are a delightful blend of sweetness and tanginess, making them an excellent addition to burgers, sandwiches, and salads. Whether you’re canning for a family gathering or simply stocking up your pantry, this recipe ensures you have delicious pickles ready to elevate any dish. Their unique flavor profile makes them a standout choice for all occasions.
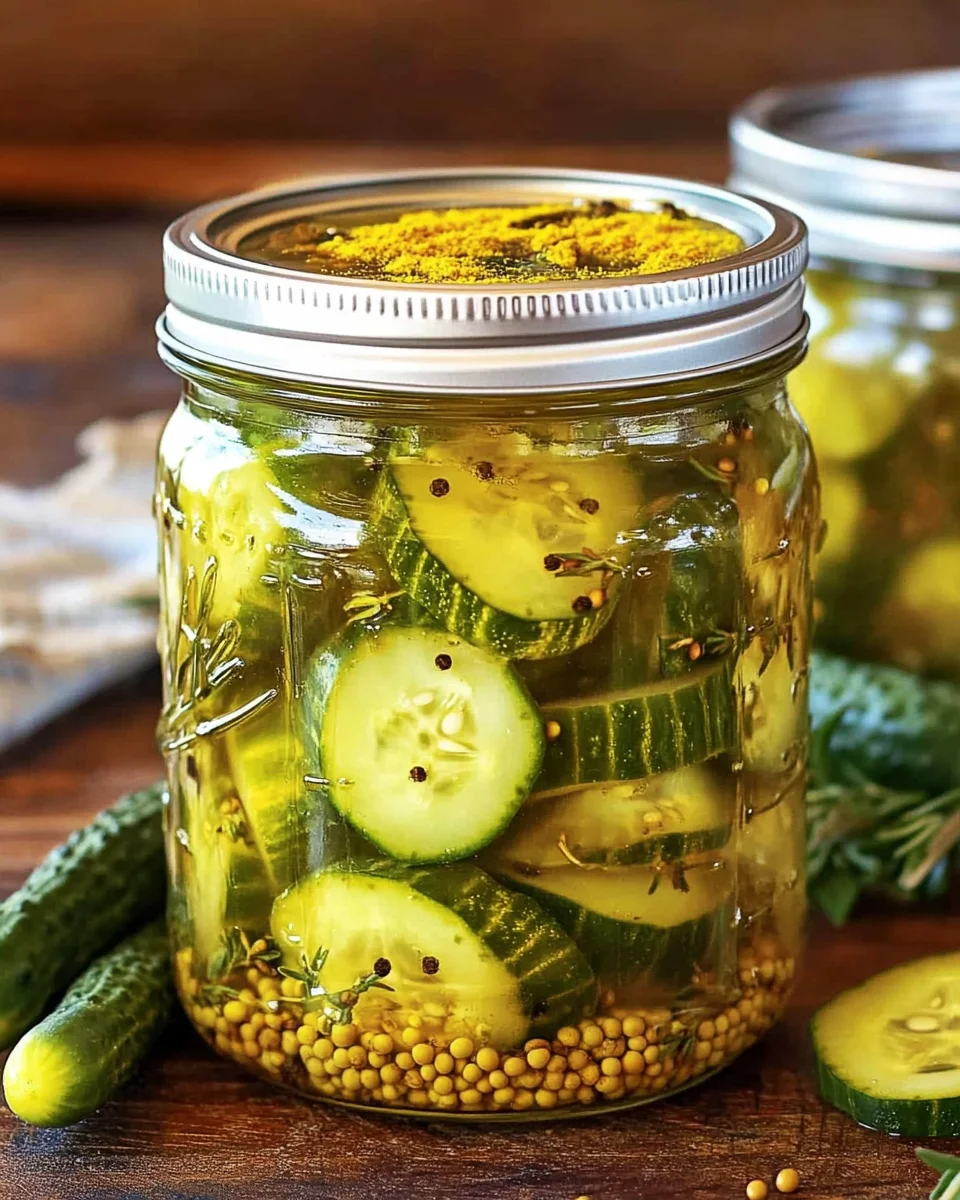
Why You’ll Love This Recipe
- Easy to Make: The steps are straightforward, making it perfect for beginners.
- Perfectly Balanced Flavor: This recipe offers a delightful mix of sweet and tangy that appeals to everyone.
- Versatile Use: Great as a snack, sandwich topping, or side dish with meals.
- Long Shelf Life: Properly canned, these pickles can last up to a year.
- Family Tradition: This recipe carries the charm of home cooking passed down through generations.
Tools and Preparation
Before diving into the recipe, gather your tools and set up your workspace. Using the right equipment will help ensure your pickling process is smooth and successful.
Essential Tools and Equipment
- Jars
- Lids
- Screw bands
- Canning pot or water bath canner
- Jar lifter
- Ladle
- Canning funnel
- Bubble popper
Importance of Each Tool
- Jars: Essential for storing your pickles; ensure they are sterilized for safety.
- Canning pot: Helps in processing the jars safely while maintaining temperature.
- Jar lifter: Makes it easy to handle hot jars without burns or spills.
Ingredients
These bread and butter pickles are a perfect balance of sweet and tangy flavors. Perfect for topping your favorite burgers or adding to salads.
The Salad Bowls Amazon Chose and Customers Love!
- 3 pounds pickling cucumbers
- 1 pound onions
- 1/4 cup canning or pickling salt
- 2 quarts crushed ice or ice cubes and water
- 1 cup sugar
- 1 tablespoon yellow mustard seed
- 1 teaspoon celery seed
- 1 teaspoon ground turmeric
- 1/2 teaspoon black peppercorn
- 3 cups apple cider vinegar (5% acidity (or white vinegar))
How to Make Granny’s Bread and Butter Pickles Recipe
Step 1: Prepare Your Cucumbers and Onions
- Wash cucumbers thoroughly, cut into 1/4-inch slices discarding ends.
- Peel and thinly slice onions. Combine sliced cucumber and onions in a large bowl.
- Sprinkle canning salt over the top of the cucumbers and onions, cover with ice and water, allowing them to stand for 3 hours.
Step 2: Prepare Your Canning Equipment
- Wash your jars, lids, screw bands, and canning tools in hot soapy water. Rinse thoroughly to remove all suds.
- Set aside to air dry on a clean kitchen towel.
- Place the jar rack into the water bath canner, add jars into the canner, then fill with water to cover the jars completely.
- Bring the canner to a simmer (180˚F) for about 10 minutes while keeping the jars hot.
Step 3: Make Your Bread and Butter Pickles
- In a large pot, combine sugar, mustard seed, celery seed, ground turmeric, peppercorns, and vinegar. Begin heating just until it reaches a boil.
- Drain and rinse the cucumber and onions under fresh water before adding them to the pot.
- Return everything to boil briefly before reducing heat to keep warm as you fill your jars.
Step 4: Can Your Bread and Butter Pickles
- Spread a kitchen towel on the counter for jar placement.
- Use the jar lifter to remove a hot jar from the canner; drain excess water before placing it on the towel.
- Pack hot cucumbers and onions loosely into each jar using your ladle through a canning funnel while ladling brine over them until reaching a 1/2 inch headspace.
- Run a bubble popper through each jar to release any trapped air bubbles; ensure all pickles are submerged under brine before adjusting headspace if needed.
- Wipe down rims of jars with a cloth before centering lids on top; screw on bands until fingertip tight using your jar lifter to return jars back into canner.
- Once all jars are placed inside, adjust water level so it’s at least 2 inches above jar tops before covering with lid.
Step 5: Cool and Store the Jars
- Allow boiling process for pint jars at altitudes below 1,000 feet for about ten minutes after reaching vigorous boil; adjust time based on elevation if necessary (see note).
- When processing is complete, turn off heat but let sit with lid on for about five minutes before removing cover carefully by tilting away from you.
- Use jar lifter again removing each filled jar upright onto dry towel allowing unsealed lids time cooling undisturbed between twelve hours minimum – twenty-four hours maximum depending on environment conditions!
- After cooling period check seals by pressing centers; sealed lids won’t pop back when pushed! Any that do must be refrigerated within one week timeframe remaining good only short-term thereafter!
With this Granny’s Bread and Butter Pickles Recipe, you’re sure to create delicious homemade pickles that everyone will love! Enjoy preserving this cherished family treat today!
How to Serve Granny’s Bread and Butter Pickles Recipe
Granny’s Bread and Butter Pickles are an excellent addition to many meals. Their sweet and tangy flavor enhances a variety of dishes, making them versatile for any occasion.
On Burgers
- Adding slices of these pickles on top of burgers adds a delightful crunch and a burst of flavor that complements the meat perfectly.
In Salads
- Tossing these pickles into salads provides a refreshing tang that elevates ordinary salads to something special, especially in potato or tuna salads.
With Charcuterie Boards
- Include Granny’s pickles on your charcuterie board for a delightful contrast to meats and cheeses. They add color and flavor that will impress your guests.
As a Snack
- Enjoy them straight from the jar as a quick snack. Their sweet-tart taste is satisfying and perfect for those craving something crunchy.
In Sandwiches
- Layer these pickles in sandwiches or wraps for an extra layer of flavor. They pair wonderfully with deli meats and cheeses, making any sandwich more exciting.
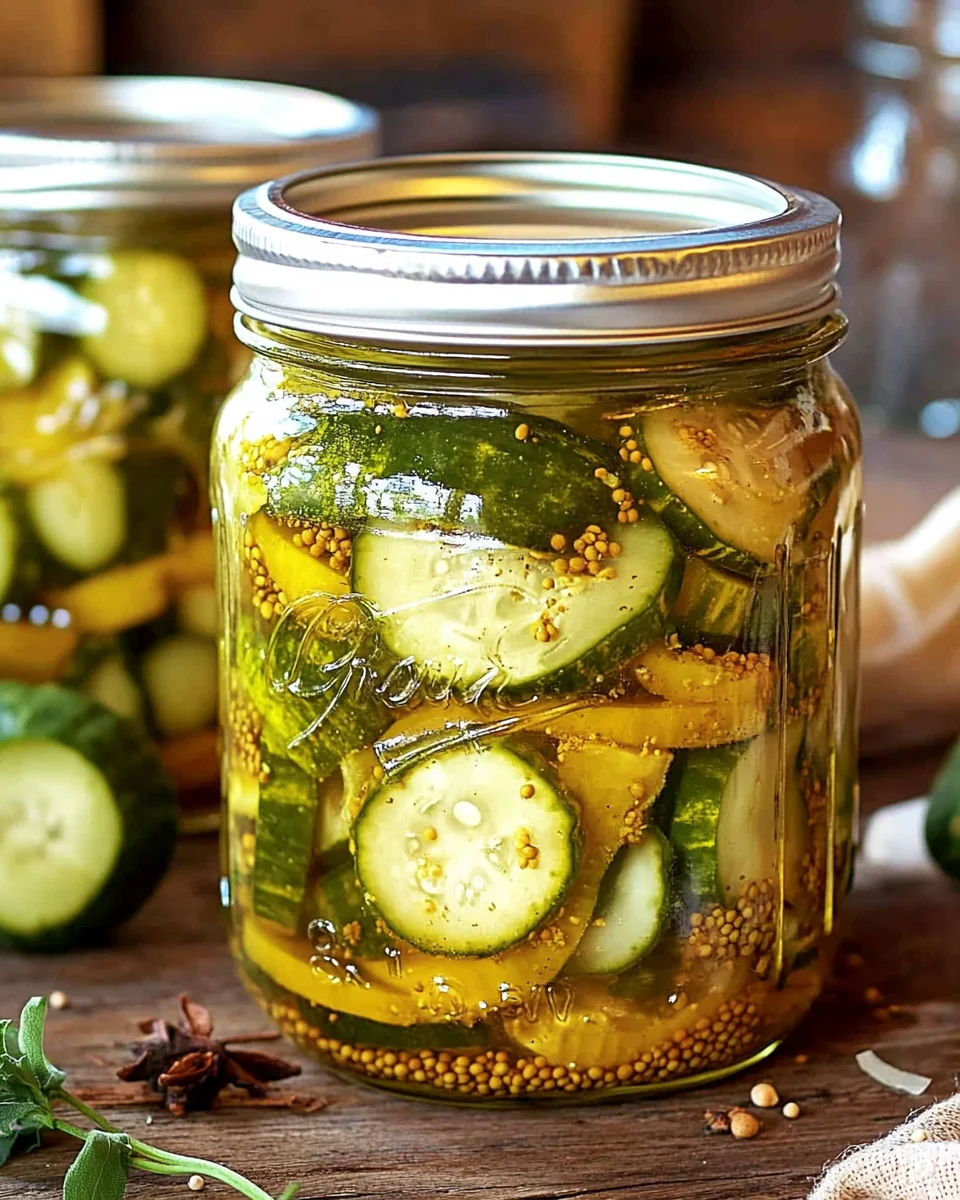
How to Perfect Granny’s Bread and Butter Pickles Recipe
To achieve the best results with Granny’s Bread and Butter Pickles, consider these helpful tips.
-
Use Fresh Cucumbers: Always choose firm, fresh cucumbers for the best texture in your pickles. This ensures they remain crunchy after canning.
-
Slice Evenly: Cutting the cucumbers into uniform slices helps ensure they pickle evenly, giving you consistent flavor in every bite.
-
Adjust Sugar to Taste: If you prefer sweeter pickles, feel free to add an extra tablespoon of sugar. Adjusting the sweetness allows you to customize the recipe to your liking.
-
Check Seals Properly: After cooling, be sure to check that all lids have sealed properly. This step is crucial for long-term storage.
-
Experiment with Spices: Feel free to add other spices like dill or red pepper flakes for a unique twist on the classic recipe.
Best Side Dishes for Granny’s Bread and Butter Pickles Recipe
Granny’s Bread and Butter Pickles can enhance many side dishes, making them even more enjoyable. Here are some great options to consider.
-
Coleslaw – A creamy coleslaw pairs nicely with the tanginess of the pickles, creating a delightful contrast.
-
Potato Salad – The sweetness from the pickles complements creamy potato salad beautifully; mix in chopped pickles for added flavor.
-
Deviled Eggs – Add finely chopped pickles into deviled egg filling for an unexpected twist that enhances their taste.
-
Baked Beans – Sweet baked beans go well with tart pickles; their flavors balance each other out perfectly.
-
Cornbread – A slice of warm cornbread served alongside these pickles creates a comforting Southern-inspired meal.
-
Fried Green Tomatoes – The crispy texture of fried green tomatoes pairs nicely with the crunchy pickles, adding layers of flavor.
-
Macaroni Salad – Tossing in diced bread and butter pickles gives macaroni salad a sweet kick that everyone will love.
-
Grilled Cheese Sandwiches – Serve alongside gooey grilled cheese sandwiches; the acidity of the pickles cuts through the richness beautifully.
Common Mistakes to Avoid
Making Granny’s Bread and Butter Pickles can be a fun experience, but there are common mistakes that can affect the final product. Here are some to watch out for:
-
Skipping the salt step: Failing to sprinkle canning salt on the cucumbers and onions can lead to soggy pickles. Always remember to let them sit with salt and ice for the recommended time.
-
Not sterilizing jars properly: Using unwashed or improperly dried jars can result in spoilage. Ensure all jars and lids are cleaned thoroughly before use.
-
Ignoring headspace: Leaving insufficient headspace in your jars can cause overflow during processing. Maintain a 1/2 inch headspace for best results.
-
Processing time errors: Not adjusting processing times based on altitude can lead to an unsafe product. Always check guidelines for your elevation when canning.
-
Neglecting seal checks: Not checking if your jar lids have sealed properly could cause wasted pickles. After cooling, push down on the center of each lid to ensure it doesn’t flex.
-
Storing too soon: Moving jars too quickly to storage can disrupt the sealing process. Allow jars to cool undisturbed for 12 to 24 hours before storing.
Refrigerator Storage
- Store opened jars of Granny’s Bread and Butter Pickles in the refrigerator.
- They will keep fresh for up to 3 months once opened.
- Use airtight containers or keep them in their original jar with a tight lid.
Freezing Granny’s Bread and Butter Pickles Recipe
- Freezing is not recommended for this recipe, as it affects texture.
- If you must freeze, consider packing only the brine without cucumbers, but this is not traditional.
Reheating Granny’s Bread and Butter Pickles Recipe
-
Oven: Preheat your oven to 350°F. Place pickles in an oven-safe dish covered with foil for about 10 minutes.
-
Microwave: Place pickles in a microwave-safe bowl. Heat in 30-second intervals until warm, stirring in between.
-
Stovetop: Heat pickles gently in a saucepan over low heat until warmed through, stirring occasionally.
Frequently Asked Questions
What is the best way to serve Granny’s Bread and Butter Pickles?
You can serve these sweet and tangy pickles alongside burgers, sandwiches, or salads for added flavor.
How long do Granny’s Bread and Butter Pickles last?
When unopened, they last up to one year stored in a cool, dark place. Once opened, consume within three months if refrigerated.
Can I customize Granny’s Bread and Butter Pickles Recipe?
Absolutely! You can adjust the sugar level or add spices like red pepper flakes for a spicy kick.
How do I know if my pickles have gone bad?
If you notice any off smells, unusual colors, or bulging lids after sealing, discard them immediately as they may be spoiled.
Can I use regular cucumbers instead of pickling cucumbers?
While you can use regular cucumbers, pickling cucumbers are firmer and hold up better during the canning process.
Final Thoughts
Granny’s Bread and Butter Pickles offer a delightful blend of sweetness and tanginess that enhances many dishes. This versatile recipe allows room for customization based on personal taste preferences. Whether served with grilled meats or tossed into salads, these pickles are sure to become a favorite addition to your meals. Give this recipe a try—your taste buds will thank you!
Granny’s Bread and Butter Pickles Recipe
- Total Time: 50 minutes
- Yield: Approximately six pint-sized jars (12 servings) 1x
Description
Granny’s Bread and Butter Pickles are a cherished family recipe that delivers the perfect balance of sweetness and tanginess. These delightful pickles add a burst of flavor to burgers, sandwiches, salads, and charcuterie boards. Whether you’re new to canning or an experienced enthusiast, this simple recipe will guide you through the process of creating delicious homemade pickles that are sure to impress your family and friends. With a long shelf life and versatile uses, you’ll want to keep these on hand for any occasion. Dive into this timeless recipe and enjoy the taste of nostalgia with every bite.
Ingredients
- 3 pounds pickling cucumbers
- 1 pound onions
- 1/4 cup canning or pickling salt
- 2 quarts crushed ice or ice cubes and water
- 1 cup sugar
- 1 tablespoon yellow mustard seed
- 1 teaspoon celery seed
- 1 teaspoon ground turmeric
- 1/2 teaspoon black peppercorn
- 3 cups apple cider vinegar (5% acidity or white vinegar)
Instructions
- Thoroughly wash cucumbers, slice them into 1/4-inch rounds, and discard ends. Peel and thinly slice onions. Combine cucumbers and onions in a large bowl.
- Sprinkle canning salt over the mixture, cover with ice water, and let stand for 3 hours.
- Sterilize jars, lids, and canning tools in hot soapy water; rinse well.
- In a large pot, combine sugar, mustard seed, celery seed, ground turmeric, peppercorns, and vinegar; bring to a boil.
- Drain cucumber-onion mixture and rinse under cold water before adding it to the pot.
- Boil briefly before reducing heat to keep warm as you fill the jars.
- Pack hot cucumbers into sterilized jars using a ladle through a canning funnel while ladling brine until reaching 1/2 inch headspace.
- Run a bubble popper through each jar to release air bubbles; ensure all pickles are submerged under brine.
- Wipe rims of jars clean before placing lids on top; screw on bands fingertip tight.
- Process jars in a boiling water bath for about ten minutes (adjust time based on altitude).
- Allow jars to cool undisturbed for at least 12 hours before checking seals.
- Prep Time: 20 minutes
- Cook Time: 30 minutes
- Category: Condiment
- Method: Canning
- Cuisine: American
Nutrition
- Serving Size: 60g
- Calories: 45
- Sugar: 9g
- Sodium: 330mg
- Fat: 0g
- Saturated Fat: 0g
- Unsaturated Fat: 0g
- Trans Fat: 0g
- Carbohydrates: 11g
- Fiber: 0g
- Protein: <1g
- Cholesterol: 0mg
Grab This Chef Knife Now - Almost Gone!

Leave a Comment